

Windows 8 and Windows 8.1 don’t come with any of this bloatware, which is undoubtedly a perfect thing for the random user. This will definitely help normal users to improve their computer speeds as we are not supporting any 3rd-party downloading links. We are only providing you the official links to download.
I hope after reading this, you will understand the real benefits of using Windows 8 over other versions of windows. But if you use some excellent antivirus package, you are all set to go Man! Let us look at the minimum specifications of windows 8 to be installed on your computer. After this, we will move on to the download sections of the window 8 32 bit and 64 bit.
Minimum System Requirements
If you are going to install windows 8 on your computer have a look at it. Nowadays all the computer comes double than this specification but it’s our job to actually let you know the minimum specs.
- RAM: 1 GB for 32-bit or 2 GB for 64-bit
- Processor: 1 GHz
- Disk Space: 16 GB for 32-bit or 20 GB for 64-bit
- Graphics: DirectX 9 graphics with WDDM driver
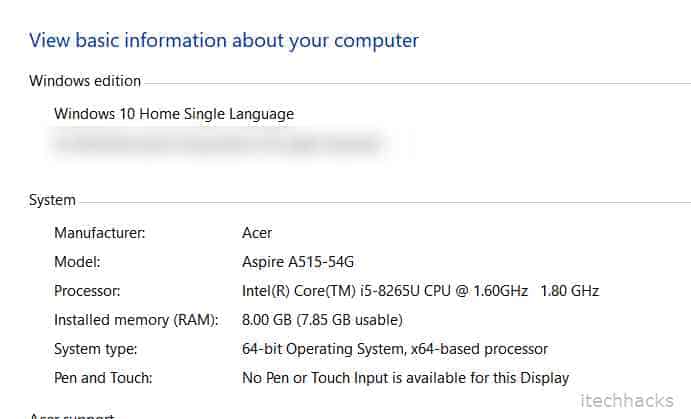
How To Check System Configuration?
Well, Just right click on ‘This PC’ or ‘My Computer’ > Properties and there you’ll get your system configurations.

Laptop or computer without an operating system
You newly brought your personal computer, but there is no operating system installed in it. Or you just built your very own personal computer. Install windows to a laptop for the first time is of a different process.
- Get your hands on either a bootable USB or a CD.
- As soon as you plugin either of the bootable devices. If there is no operating system in your computer, then the system hardware with automatically boot your computer.
- As soon as you power on your computer starts pressing “function key + F2 key” to enter BIOS. BIOS helps in furthering the process of installation. Bur be careful in some laptops the shortcut to enter the BIOS is “Function key + F8/ del key” you never know.

- Ones the BIOS opens. Go to the boot menu on the top. Fourth from left. You can only do this using the arrow key. Since BIOS does not allow the user to use the mouse, don’t ask me why.
- Firstly, after the boot menu opens, leave the Boot Mode to “Legacy support” and change Boot priority to “Legacy first.”
- Leave the USB Boot “enabled” and PXE Boot to LAN “enabled.”
- Go down to the next bit, the setting under the title Legacy. To set the USB in which the windows is installed as the priority. Bring the USB HDD on the top but simple pressing enter and using the up arrow to bring it on the top.
- To save these Boot setting press “function key + F10 key“. And select “yes.”

- As soon as you do this, the system will restart.
- Lay back for a while until the windows install.
- Now let’s get into the setting up your operating system.
- The first thing that pops up is Personalize setting. Here you can choose any color that you like. The color that you want here is the theme that your system OS will use after selecting the color. Give your PC a name cause your PC deserves a name. Any name of your choice. Click on next.
- The next page will show settings here; you have two options either to use “express settings” or to “customize” your settings. I would recommend you use the express settings as customizing the setting will take a lot of time, and it is unnecessary. Well, it is your computer. If you want to customize and spend more time with your computer, please go ahead.
- But if you are willing to customize your settings. I am here to help you here too. Click on customize settings.
- The next page will appear as about internet connection click on “yes” if it’s for home. If its somewhere else other than home, then do what is necessary. Then click on next.
- The next page is about updates of PC. I would recommend checking everything and click on next.
- The following setting is about the solutions check by windows. Do the necessary and click next. A recommendation is to keep the same and not change anything.
- The next setting is sharing the information with Microsoft for better usage in the future. Select whatever you want to share. And click on next.
- After clicking next. The next page is about setting up a Microsoft account. Either create a new account or if you already have an account, then type those in. And follow-through.
- After creating an account, a SkyDrive setting pops up. Click on next.
- Now all the things that you just set up with get started. Wait for a while.
- After finalizing your set up. The operating system is good to go. And is ready to serve its purpose.
- The primary lock will appear. Click on the lock screen wallpaper and then type in your password.
- And your Windows 8 is up and running.
- Congrats, you have done it.
Download Windows 8/8.1 ISO (32-64 Bit) 2020
So, now you have a personal computer, and you are still using the older version of windows, and you want to upgrade to windows 8. It’s a simple process. Do not worry.
- Download the Windows 8 ISO file from the given link below
- https://www.microsoft.com/en-in/software-download/windows8ISO

- you must buy the windows 8 to keep it authentic and to get regular updates. But glad to know that Windows 8.1 is free.

- The very first step to do is to burn the ISO file into DVD. You can do so by. Go to the windows Iso file. Right-click on the file. And click on “burn disc image.” Note that you can do this only on Windows 8, and Windows 8.1. If you are using a lower version of windows. You have to download the image burner software from the link given https://www.poweriso.com/download.php
- If you are using the lower version, download the software.
- Right-click on the Windows 8 ISO file and click on “open with.”
- Then click on the power ISO software and burn the disc.
- After burning the disc, open the DVD drive and click on setup.
- Then you get a window popped up, click on “yes.”
- Wait for a while until the windows set up, get ready.
- Ones the set up gets initialized. A window pops up about essential updates. Click on “Download and install the update.” But I would recommend not to. Cause it will speed up the installation. One’s windows are installed you can update your windows.
- Click on next. And type in the product key that you got while buying the windows product.
- The accept the “license and agreement” and click on accept.
- Now the tricky part is to either forgo all the files you had in your previous Windows operating system or to keep your personal files.

- A recommendation is to click on “keep personal files only,” then click on next.
- Now we wait while the system gets ready to install the new windows 8.
- If you are upgrading, a prompt will show that you need to choose the languages again while setting up windows 8. Click ok.
- Click on the install and take a walk. The installation is a slow process depending on the type of system you are using. It usually takes half-an-hour to one hour, maybe more.
- The rest of the step is about personalizing your windows.

- The first thing that pops up is Personalize setting. Here you can choose any color that you like. The color that you want here is the theme that your system OS will use after selecting the color. Give your PC a name cause your PC deserves a name. Any name of your choice. Click on next.
- The next page will show settings here; you have two options either to use “express settings” or to “customize” your settings. I would recommend you use the express settings as customizing the setting will take a lot of time, and it is unnecessary. Well, it’s your computer. If you want to customize and spend more time with your computer, please go ahead.
- But if you are willing to customize your settings. I am here to help you here too. Click on customize settings.
- The next page will appear as about internet connection click on “yes” if it’s for home. If it is for work or somewhere else other than home, do what is necessary. Then click on next.
- The next page is about updates of PC. I would recommend checking everything and click on next.
- The following setting is about the solutions check by windows. Do the necessary and click next. A recommendation is to keep the same and not change anything.
- The next setting is sharing the information with Microsoft for better usage in the future. Select whatever you want to share. And click on next.
- After clicking next. The next page is about setting up a Microsoft account. Either create a new account or if you already have an account, then type those in. And follow-through.
- After creating an account, a SkyDrive setting pops up. Click on next.
- Now all the things that you just set up with get started. Wait for a while.
- After finalizing your set up. The operating system is good to go. And is ready to serve its purpose.
- The primary lock will appear. Click on the lock screen wallpaper and then type in your password.
- And your Windows 8 is up and running.
- Congrats, you have successfully upgraded your Windows 8 on your desktop or laptop.
- Install Windows 8 – Dual Boot
- Dualing booting a laptop is simple, but it needs certain specific steps to be followed. Dual-booting means having two different operating software on one personal computer. Now, for instance, you have ubuntu or any other operating system. It can also include windows 7 or lower or higher than windows 8 on your personal computer, and you want to install windows 8 and dual boot your computer. The following steps will help you dual boot your personal computer.
- Firstly you have to manage your disk for two different OS. To do this.
- On the start, menu type in PC. And right-click on “This PC.” And click on manage.
- Then click on “Disk management.” Then go to C: drive. Click and press on “shrink volume.”
- Type in the desired storage you want to manage for your windows 8 dual boot system.
- Then right-click on the new shrunk volume and press on simple volume. Click on next.
- On the next tab. I would highly recommend you to name your volume label as it will be easier for you to know in what storage thee operating the software is installed.
- Then click on the finish. The volume will start to formate and get your storage device ready.
- The next step is to get your hands on windows 8 bootable USB or CD.
- Insert your bootable drive and shut down your computer.
- As soon as you power on your computer starts pressing “function key + F2 key” simultaneously.
- Your BIOS will open. From there then go to the boot menu.
- Go down to the USB drive or CD drive and bring it on top of other menus as it will prioritize everything. Then press F10 and click enter.
- Press any key to boot from the CD or USB.
- Your system will pretty much start booting from the CD or USB as windows 8 will start getting installed.
- After typing in your product key. A window will pop up about where should the new operating system be installed in.
- Click on custom and then click on the volume that you new assorted for windows 8 installation.
- Now to windows will get installed entirely.
- After windows 8 gets installed, and the page will appear on the screen asking to choose which operating system to choose from click on windows 8 just to make sure that Windows 8 is completed it booting and setting up.
- Ones the booting is done windows 8 will start to run.
- Now, if you want to run your personal computer on other operating systems, all you have to do is restart your computer.
- Every time you power on or restart your computer. A menu will pop up where the system asks you to choose from which operating system your computer should boot on.
 Reviewed by KOLITE TECH
on
July 24, 2020
Rating:
Reviewed by KOLITE TECH
on
July 24, 2020
Rating:


No comments: